As you may have gathered I am also from Switzerland. My mom is American and my dad is Swiss. I have dual citizenship which is petty cool to have. (Don't think I'm bragging, I just find my heritage very interesting). So, after living in Switzerland for 12 years I have become very familiar with what many of us consider a national dish. It originated from the Kanton (Similar principle to American states) that I grew up in, Bern. The closest thing you could liken it to in American food would be a type of cake patty made out of hash browns. But I guess the easiest way to show you what it is, is to dive right in. So, shall we?
This is what you'll need:
Potatoes
Butter
Salt & Pepper
Bacon (I've pictured the bacon here because I used it. It is however optional. You can make it with just the potatoes and butter as is the most traditional. Since we're Swiss we will often add cheese. I didn't today, but you totally can and it's delicious!)
I like to use a cast iron pan. I'm sure you can do it with a different pan, but for low and slow cooking you can't beat cast iron, it heats very evenly.
So unlike in American hash browns, you need to precook your potatoes. There are a few that may cook this dish with raw potatoes, but trust me, it's way better if you precook them.
Scrub your potatoes:
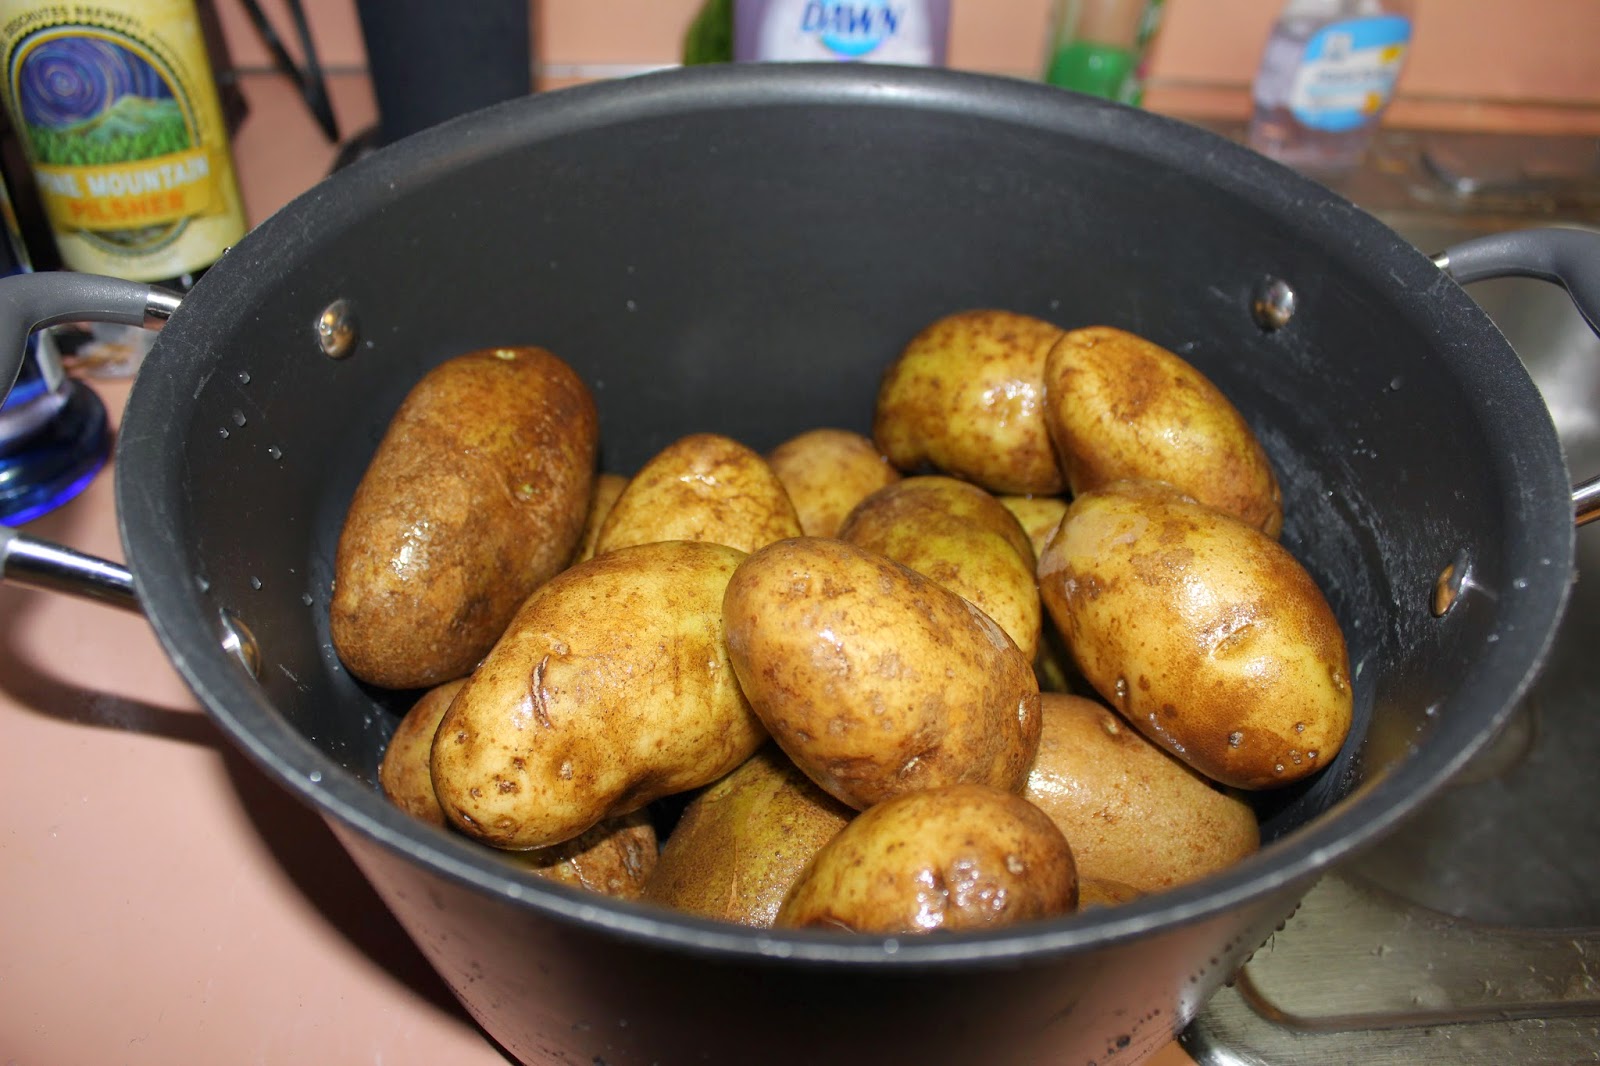
Now boil your potatoes. If you want you can just par boil them, but I recommend cooking them all the way through. Buy potatoes you can cook through without them starting to disintegrate. You want them to still be firm enough that you can grate them.
I just scrub them and leave the peel on. Once they're cooked, the peel pretty much just slides off. So often I will just cook the potatoes the day before. You want to make sure they are really cooled off before you try and peel and grate them. If they're still warm it gets messy and they pretty much just smush when you try to grate them.
If a few bits of peel stay stuck on the potato it's really no biggie. This is a rustic dish.
Now grate them with a big holed grater. I'm spoiled with a mother who is a food snob and raised me to be a food snob (according to my husband). The good part of this is, that my mom understands the need for fabulous kitchen appliances and got me a cuisinart. Guys, that's the one to get! My mom has had hers for longer than I've been alive. You might think you're saving money by getting a cheaper brand, but depending on which you get (for example Black&Decker) is not as strong or as durable. Now I'm not a cusinart spokes person, I just know I love my regular sized food processor by them, as well as my mini one, and wouldn't trade them for the world. Also I'm not knocking Black&Decker, they make sweet power tools, just the food processor they make, that I used was a tad pitiful, or I'm just spoiled and expect too much.
Anyway I used my food processor with the corresponding attachments to grate my taters.
Sprinkle with salt & pepper, then mix.
Since I'm using bacon I now cut that up:
Render the bacon:
I like my bacon crispy so I cook it a bit longer. I like to cook slowly to render the fat as we will be using that fat to cook the potatoes in.
Once the bacon is ready, I remove the bacon, but leave the grease in there. If you are making the vegetarian version you just add a lot of butter to the pan and melt it. If you are using bacon, mix the bits into the potatoes. This is where you could also add cheese if you wanted it.
Once it's mixed you add the potato mixture to the preheated thoroughly greased pan and gently compact it with your hands. I pretty much let it fill the frying pan.
Lets get real, this is not diet food. No where close, which is why it's a special treat we don't make very often. So if you do make it, go full hog. I.e. I but three dabs of butter on top of my potatoes:
Here you can see my two beauties cooking away:
So now you will let that cook at medium to medium low heat for about 20 minutes. This gives you a delicious, crispy, crunchy crust.
Now if you're my mom you can do some expert level shit by flipping it up in the air. If you're me you just put a plate over/on the pan and turn the potatoes out on to the plate. If you haven't used quite enough grease some of the crust may stay stuck to the bottom of the pan, gently peel it off and put it on top of the turned out patty.
Now add and extra bunch of butter to your frying pan.
Props to my lovely husband for coming out and helping me.
Gently slide the potato patty crust side up back into the frying pan:
Gently....
Plopp!
So this is where you could put cheese slices on top of the crusty side. They will melt while you are cooking the other side for another 20 minutes, again on medium to medium low heat.
And now look at your beauty:
Crispy crunchy on the outside, ooey goey on the inside.
There you have it. It's not really hard, you may just need a bit practice to get the right temperature and cooking time. It takes longer than other stuff, but doesn't have a lot of active time.
Quickie Summary:
Ingredients:
Potatoes (cooked and cooled)
Butter
*optional: bacon and/or cheese
Grate the potatoes.
Mix potatoes with salt and pepper.
*Add cooked bacon and/or grated cheese if using.
Preheat a cast iron frying pan with copious amounts of butter or bacon grease.
Put potatoes into the frying pan.
Gently form them to the pan and press them down.
Cook for 20 minutes on medium to medium low heat.
Use a plate or your preferred method to flip the potatoes.
Before you put the potatoes back into the pan add a bunch of butter.
If desired, add cheese slices to the top, they will melt.
Cook for another 20 minutes.
This blog is a bit about everything and a bit about nothing. I am leaving this very open to write about whatever I feel like. I've started with recipes for now, but will be posting about any and all crafty endeavors I have. Currently I'm working on reinstating Sunday night dinners, so there should be a new food post either every Sunday evening or Monday.
Showing posts with label Bacon. Show all posts
Sunday, February 1, 2015
Sunday, January 11, 2015
Pasta Carbonara
My friend Marie asked me to make this recipe for the blog since she saw pics of it on instagram. Honestly, pasta carbonara is super easy to make, and tastes delicious. This is a dish however that doesn't reheat terribly well. It's kind of like mac and cheese for adults, super charged with bacon.
So here goes. This is what you need:
I was making a big recipe because we had 5 people eating it for dinner yesterday. You can absolutely reduce the amount!
Pasta (Any kind will work. I've made it with fettuccine, farfalle, macaroni, and in this case rotini) Bacon (I prefer the thick cut kind, I'd use about a regular sized packet)
Heavy whipping cream (In this case I used just over a pint)
Parmesan (I used 2.5 bags, each bag was about 1.5 cups)
Cut your bacon into smallish pieces:
Toss those in your preheated pot. I use a dutch oven, but you could also use a sauce pan or whatever works for you.
Render your bacon, the bacon grease will be the base of your sauce.
Now add a bunch of cream. In this case I used somewhat over a pint of cream. You can kind of figure this out by what the desired proportions are.
Now add about 2.5 bags of parmesan.
Make sure you blend the cream and cheese well. If your sauce seems too runny, add cheese. If your sauce seems too thick, add cream. Also add a lot of black pepper. Carbonara comes from the Italian word for coal. The pasta is named carbonara because of all the pepper looking like coal pieces.
Cook your pasta following directions, and then add the pasta to the sauce. You could serve the sauce on the side, but in my experience it's easier to just mix it all together and then serve.
Boom! You now have pasta carbonara. See how easy this is? If you want a vegetarian version of it you can use butter in place of the bacon and bacon grease.
As I mentioned earlier, this pasta doesn't reheat very well in the microwave. The fat separates and it becomes really greasy/oily. To counteract this you can add a bit of extra whipping cream to the pasta before microwaving it. Then stir it up really well. That should help, but it is still a dish better eaten fresh.
Quickie Summary:
Ingredients:
Bacon (1 pack)
1+ pint heavy whipping cream
2-3 bags parmesan
Pasta
Preparation:
Cut up bacon
Render bacon
Add cream
Add parmesan
Mix thoroughly
Ensure all cheese has been melted
Add cooked pasta to the sauce
Serve
So here goes. This is what you need:
I was making a big recipe because we had 5 people eating it for dinner yesterday. You can absolutely reduce the amount!
Pasta (Any kind will work. I've made it with fettuccine, farfalle, macaroni, and in this case rotini) Bacon (I prefer the thick cut kind, I'd use about a regular sized packet)
Heavy whipping cream (In this case I used just over a pint)
Parmesan (I used 2.5 bags, each bag was about 1.5 cups)
Cut your bacon into smallish pieces:
Toss those in your preheated pot. I use a dutch oven, but you could also use a sauce pan or whatever works for you.
Render your bacon, the bacon grease will be the base of your sauce.
Now add a bunch of cream. In this case I used somewhat over a pint of cream. You can kind of figure this out by what the desired proportions are.
Now add about 2.5 bags of parmesan.
Make sure you blend the cream and cheese well. If your sauce seems too runny, add cheese. If your sauce seems too thick, add cream. Also add a lot of black pepper. Carbonara comes from the Italian word for coal. The pasta is named carbonara because of all the pepper looking like coal pieces.
Cook your pasta following directions, and then add the pasta to the sauce. You could serve the sauce on the side, but in my experience it's easier to just mix it all together and then serve.
Boom! You now have pasta carbonara. See how easy this is? If you want a vegetarian version of it you can use butter in place of the bacon and bacon grease.
As I mentioned earlier, this pasta doesn't reheat very well in the microwave. The fat separates and it becomes really greasy/oily. To counteract this you can add a bit of extra whipping cream to the pasta before microwaving it. Then stir it up really well. That should help, but it is still a dish better eaten fresh.
Quickie Summary:
Ingredients:
Bacon (1 pack)
1+ pint heavy whipping cream
2-3 bags parmesan
Pasta
Preparation:
Cut up bacon
Render bacon
Add cream
Add parmesan
Mix thoroughly
Ensure all cheese has been melted
Add cooked pasta to the sauce
Serve
Sunday, December 7, 2014
Bacon-Chicken-Corn-Chowder
Anyway, time to get started. These are the ingredients you'll need.
2 cartons of chicken broth (I used two 1-Liter tetra packs, I prefer this brand as it's local and organic)
Heavy whipping cream (I used about a pint and a half)
1 bag frozen corn (I use the slightly larger mediumish sized one)
1 bag frozen hash browns cubed (not seasoned - they are just so much easier and taste just as good)
1 2 lbs bag of fresh carrots
1 bag celery (it's like a head of celery)
Chicken (my amount was just under 3 lbs. I used skinless boneless chicken thighs. Chicken breasts work fine and I used them for this recipe regularly, but the chicken thighs have a bit more flavor.)
Bacon
Salt
Pepper
Italian seasoning
Chicken or vegetable broth cubes (I used two this time)
Soy sauce
Worcestershire sauce
Maggi seasoning if you have it
And there's one more optional ingredient:
White wine to deglaze your pot and add concentrated flavor.
So there are different ways you can do this.
I tend to peel my carrots, but it's not necessary if you scrub them very well. Most of the vitamins are right under the skin, I just don't like the texture that much.
Now chop them up into pieces. At the bottom half where they are skinnier I just cut them into coin pieces. The top half that is thicker I tend to split down the center and then cut them into half moon pieces
Now toss them in a bowl and reserve.
Next up is the celery. Make sure you rinse it really well. At the base where they connect to the roots dirt will accumulate and be pretty resistant to cleaning off. So take the head apart and clean the stalks individually.
Cut off the bases and tips. You can include the greenery (I.a. the leaves, they taste good, but can get wilted really fast, so it's a matter of preferences yet again.) I cut them as they are for the most part they automatically make the half moon shapes, but at the base where they are thicker I sometimes cut a slice half way through like this, so it halves the size:
Now chop them up. For some reason chopping celery is immensely satisfying to me. Maybe it's the crunch and resistance, but not too much resistance. Regardless, I love it!
Put the chopped up celery with your carrots. (You don't really need a pic for this, but I just like the colors, so fresh and healthy looking, so you get one anyway.)
Now it's time to chop up your bacon. You could do this first, but I like having my veggies ready. If you're great at time management you can do these two steps reversed.
I just cut it into thin strips. You can also use the weedwacker bacon I wrote about in my recipe for Bacon Pinwheels.
Begin rendering the bacon in the pot you are planing to use for the soup. In the past I've used my various dutch oven pots, but my mom picked up this fabulous stock pot for us after our wedding. It's perfect for my chowder.
While the bacon is rendering, I cut up my chicken. You will notice that I am using dark chicken meat. I used skinless, boneless chicken thighs this time. You can absolutely use chicken breasts, which I do most of the time, but the chicken thighs are more flavorful, however also more fatty. So if you are on a diet stick with chicken breasts. Well, to be honest, diet food this soup is not, it has tons of heavy whipping cream in it. But great for a warm, cozy, fall night where you're living in chunky sweaters. You can work out in spring. ^^
The reason you're rendering the bacon is because this will be the base fat for everything in the soup. You could use olive oil or any other oil instead of the bacon and the bacon fat. I like the bacon fat because it adds a whole new level of flavor. Multidimensionality.
Once the bacon has been rendered you can add your carrots and celery.
Toss them so they are all coated in the grease and sautee them.
Now I'm adding the two bouillon cubes. I prefer Knorr. They're a great brand and always available at my local Winco. I used to use them when I lived in Germany too. If you have a Winco here's an insider tip. Check out the Hispanic foods section. They have the same chicken bouillon for a cheaper price and a larger quantity. It's worth a gander.
If you use them it goes quite a bit faster if you also break them up with your wooden stirring spoon.
Now I use a lot of white wine to deglaze my pot. If you are omitting the wine, you can use the broth to deglaze your pan.
I used about half a bottle.
Cook it down until almost all of the wine has evaporated. Then add your chicken and cook it up some.
Add a bunch of your Italian seasoning. (Sorry for the blurry pictures, the steam really interferes with my picture taking process!)
Add the broth to your pot.
Add your corn, potatoes, more Italian seasoning, pepper, and some salt. Now add liberal splashes of the worcestershire sauce, the soy sauce, and the Maggi.
Last but not least, add a bunch of cream, I added about a pint and a half of heavy whipping cream.
I usually let it simmer for a good long time to ensure everything is fully cooked, especially since I usually make it in advance of when I want to eat it.
Serve it on its own, or with this delicious No knead artisan style bread.
My husbands not a huge fan of broth and likes his soups really chunky, so that's usually how I make them.
I hope you enjoy the food. I'd love to get some feedback on what you like and what not. Please feel free to leave me a comment or shoot me an email. I'm interested in any kind of feedback, whether constructive criticism or praise which is always nice too. :)
Labels:
Bacon,
chowder,
comfort food,
corn,
cream,
fall,
heavy whipping cream,
potatoes,
Recipes,
soup
Subscribe to:
Posts (Atom)