Sunday, October 12, 2014

Bacon Pinwheels

Yesterday I did all sorts of baking, so you get two recipes for the price of one. These bacon pinwheels are also super popular and crazy easy to make. We actually made and served these at our wedding last year.
Those are them in the very front. Not bad looking, eh.
What do you think? Want to make some? Sure, it's easy as pie. Just kidding, it's way easier than making pie.

Here's what you need:

Frozen puff pastry, cream cheese (I use the whipped kind because it's so much easier to spread), parmesan, and bacon. The bacon you see in the picture is what my friend Rachel calls weed whacker bacon, technically it's called bits and ends pieces. It works just great for these purposes. I buy it all the time and end up cutting the bacon up with some great kitchen scissors.

If you're taking the puff pastry straight from the freezer, you need to let it thaw enough so you don't crack the dough when you try to bend it. However if it gets too warm, it'll stick like crazy.

I like to prepare it on a cutting board for easy clean up, but what every you feel like doing will work just fine, I'm sure.
Spread out your puff pastry sheet like this:


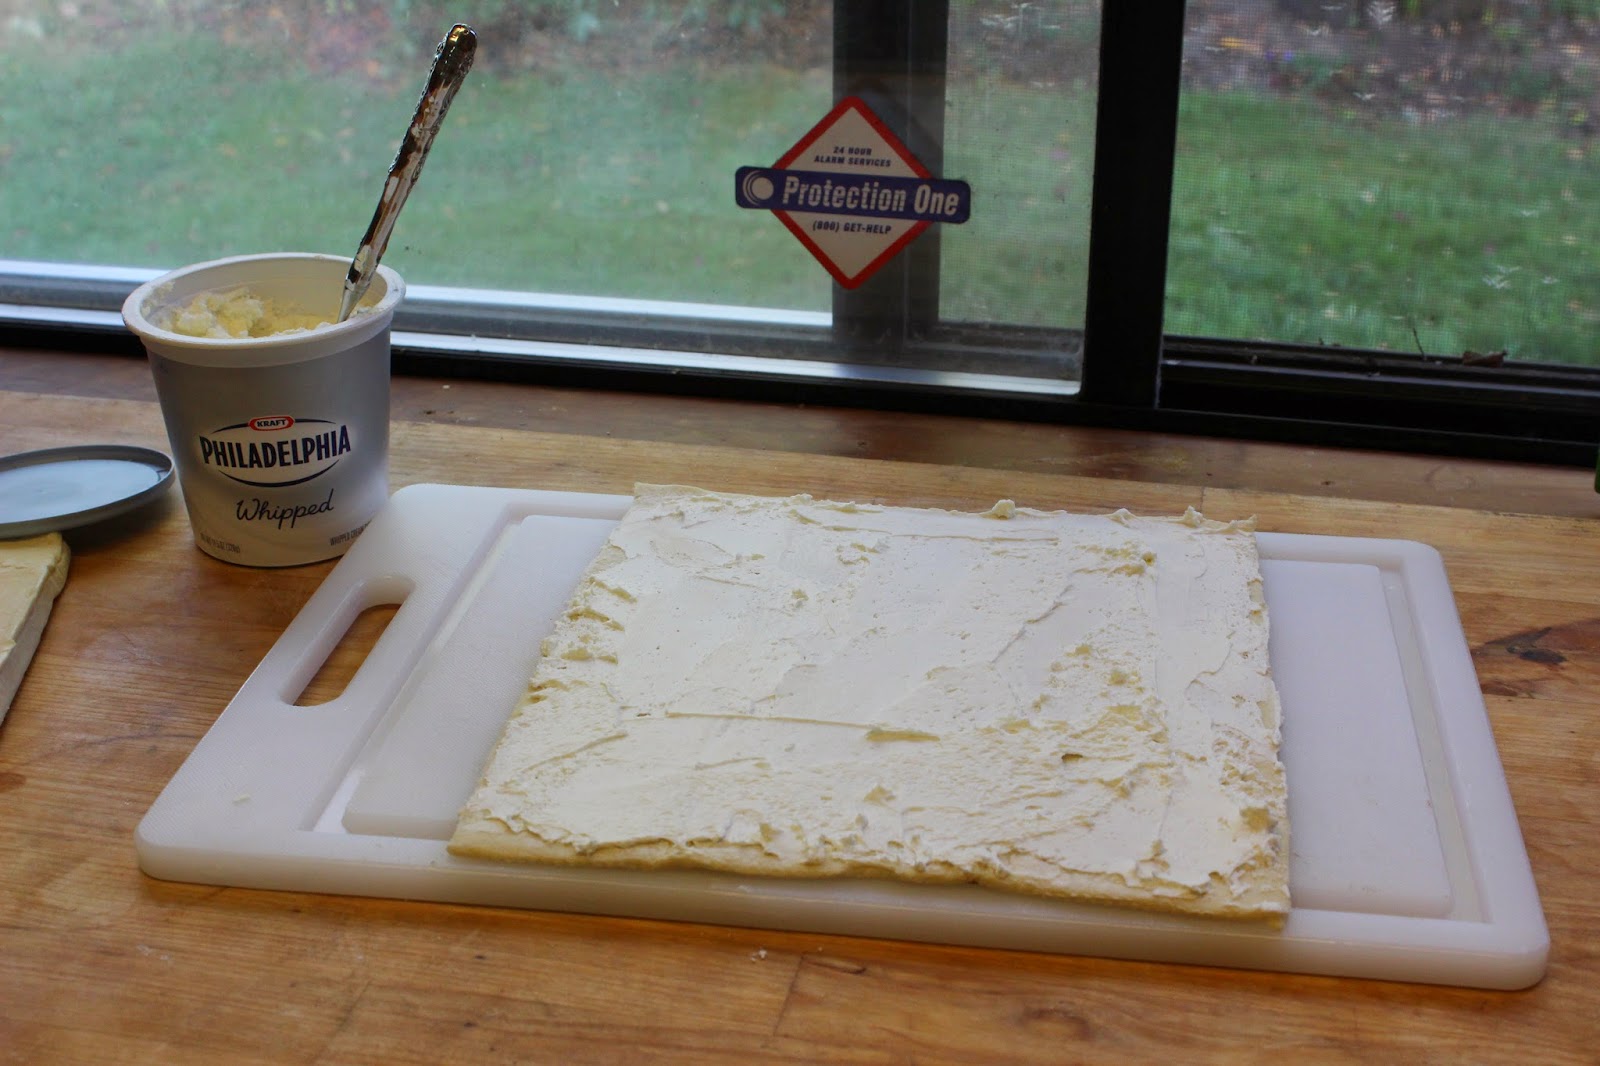
Now spread cream cheese over it:


I then add a bunch of pepper.


Then comes the Italian herb mix.


Now add shredded parmesan generously.


I then sprinkle bacon pieces all over it.


Now roll it up like this:


Roll it all the way up so it forms a log.

Now you can start cutting slices off. I find a sharp serrated knife works best.


And here's what they look like all cut up.


I bake them on my trusty pizza stone. I pretty much bake everything on a pizza stone.


Then bake at 400 fahrenheit for around 23 minutes.

I also made a vegetarian version. At the wedding we made them with pesto instead of cream cheese, and sprinkled them with sundried tomatoes and mozarella. Since I had none of those ingredients on hand, I just added Monterrey jack cheese to the cream cheese and parmesan. So essentially I made pinwheel cheese sticks.


And after baking this is the result:


This was yesterday's baking extravaganza:


Chocolate Chip Cookies

I'll admit, debating on whether I should give up this recipe with all of its secrets was tricky. It's one of my most popular recipes. I made them yesterday for a movie night. When I walked through the door I wasn't greeted with "hello", but rather with "Did you bring the stuff?".

To do some baking I have a few trusty accessories that make it all better! What makes baking more fun, and less work?
Exactly my beloved pink kitchenaid. It is absolutely in my top 5 kitchen loves!

Next I am a messy, messy person and absolutely need some protection for my clothes. So I wear this lovely apron my sister gave me for my wedding.

Last but not least we need some music! I throw pandora.com onto my little tablet and let the music flow. Cooking is way more fun when you can sing along as loudly and off key as you feel like!

Also I would like to show you guys the best measuring spoons I have ever used. They are called spice measuring spoons and are designed to fit well into spice jars. I absolutely love them and would obviously recommend them. I think I got them at a little kitchen store in town a few years ago, but I don't think they are hard to find.


I decided that someone should benefit from my awesome recipes without me having to do the work, so here you are:

First off I'll just give you the recipe and then I will write a step by step of each stage of the recipe illustrated with my photographs, and add in all of my super secret tips that make this recipe more awesome.

Here's the recipe:


Ingredients needed:
220g butter (unsalted)
(220g of butter is just under two sticks. I cut approximately a quarter inch off each stick of butter. Further down I have a photo that shows how much I cut off.)
¾ c brown sugar
¾ c white sugar
1 t warm water
1 t baking soda
1 egg
1 t salt
2 ½ c flour +-
Chocolate chips as desired (½ – ¾)
1 t vanilla

Preparation:
Whip 220g butter
Add ¾ c brown sugar and ¾ c white sugar
Add 1 t warm water, 1 t baking soda, 1 t salt, and whip in 1 egg.
Add 2 ½ c +- flour little by little
Add chocolate chips as desired

Bake at 190 C or 375 F for around 11 minutes


Now here comes the step by step:

These are all the ingredients you need:
Baking soda, brown sugar, white sugar, salt, flour, butter, vanilla extract, egg, and chocolate chips.
Now this is my first pro tip: use milk chocolate chips as opposed to semisweet. Most people don't notice it per se, but in general everyone likes the cookies better with milk chocolate chips.
Here are some groupings of the individual ingredients. 


Ok, get your butter ready for the kitchenaid (or whatever mixer you use. I've made this dough completely by  hand when I didn't have even a mixer. So it's not impossible, just harder work.).
The way I measure it is, I take two sticks of unsalted butter and cut a quarter inch piece off either end.
Unsalted is important as you want to be in control of how much salt you add. However if you have no other option, omit the salt later on in the recipe.

Then cut the butter in similar slices and throw it into your mixing bowl.

Once you have that, cream the butter. It should look something like this:

Now we add the sugars. 3/4 cups each.


Add it to the butter and mix well.

This is one of my secret ingredients. I add a tea spoon of luke warm water. This is one of the reasons my cookies are nice and soft.


Next you add the baking soda.


Make sure you blend/mix everything after adding any new ingredients.

Here comes the egg:
Pro tip number two: always crack your egg into a separate bowl first! The reason you do this is in case the egg has gone bad. If it has gone bad and you cracked it into a separate bowl, then you haven't ruined all of your other ingredients and can just throw the egg away. If you cracked it into the mixing bowl and it has gone bad, you need to throw out your butter, sugar, baking soda, etc. If that happens, you might not have enough ingredients left over to redo the beginning.
Believe me! Once you've had to throw out all your ingredients because of a bad egg, you'll always use a separate bowl. :)

Add some salt:

Ok, so the recipe says add one teaspoon of vanilla extract. Lets be honest, I never measure that, but I know I add way more than just one teaspoon. I love vanilla and make my own vanilla extract. I just add a really healthy splash.


Once all of these ingredients have been added, comes the flour. Add 2 1/2 cups. I usually add them in half cup increments so my mixer doesn't explode flour all over my kitchen.


Here is what the dough looks like after you add the flour and before you add the chocolate chips:


Now add the chocolate chips. My mom's recipe adds like a cup and a half of chocolate chips. I just dump the whole bag in, because chocolate!

Looking good!
And presto: cookie dough!

Pro tip number 3: I don't use a cookie sheet! I use a pizza stone! This makes the cookies so much better. I can't really explain, but it makes a huge difference. Often on a cookie sheet the sugar burns and caramelizes on bottoms of your cookies. On the pizza stone they stay nice and moist.
Obviously the stone doesn't stay nice and pretty like that. It just happens, that I got a new stone as a graduation gift from friends and used it for the first time to make the cookies.

Now this is what the cookies look like all portioned out onto the stone:


Here they are fresh from the oven:


Now, you do not want to leave the cookies on the stone for too long. The stone is porous and will suck all the moisture out of the cookies and make them rock hard after around 10-20 minutes or so. I transfer them onto a cooling rack.


Pro tip number four: The first batch of cookies will take about 13 minutes as the stone is still cold. The following batches will only take around 11 minutes as the stone is hot and begins cooking the dough as soon as it's dropped onto the stone.


That's all for now folks! I hope you enjoy my favorite, prize winning cookies!


Thursday, October 9, 2014

Work Shenanigans

Today was our annual IS department team day. We go to the coast every year and just longingly stare at the beach out of the window. This year was different however. We actually got free time to  test taking pictures on various cameras. I obviously had my baby with me, so I used that. Speaking of which, I'm still debating on what to name him. I'm pretty sure the zoom lenses make it a him. Hehe. Since its a Canon Rebel, I feel like I need a rebellious name to go with it. I'm open to any suggestions, feel free to leave ideas in the comment section.
I got some of my friends to make various poses for me. Much fun was had.
It was a very foggy day. Perfect conditions for a horror movie.

Now, doesn't this look ominous? I wonder where it goes!

Much as we would all have loved sunshine there, the background of the foggy, grey ocean was an ideal backdrop. It really makes the subjects pop. It looks like I just dragged and dropped the persons into the background. Keep in mind, I haven't edited or processed these pictures in any way.

My beautiful friend Meygy posing on a log. I found this quite impressive considering those boots had wedge heels!

The lovely Paul went for the action shot. As he is an actor, I can see where that would be more appealing to him.


Doing their super hero poses. Diana was such a good sport to climb up on that slippery tree trunk.

Paul does stage combat and showed Meygy how to correctly punch him. This picture really makes me think of the "We can do it" lady. Power woman!

I really liked this zoomed out picture with Meygy at the ocean side. I feel it has a very dream like quality. Slap an inspirational quote on it and we'll call it art. Hehe

Paul pretended to add to the graffiti on the wall. However we are goodie two shoes and wouldn't ever consider really adding to it. Haha. What a rebellious bunch we are! Maybe not so much, eh.

This next photo is an example of what a crazy group we are, here at IS.
Yes, indeed! This is how we transport our fabulous staff!

Time to go bye bye!


Well, these are our shenanigans of the day. It's an amazing Team to work with! If anyone in the Willamette Valley in Oregon is looking for a job, contact me! It's super fun work, and so extremely rewarding!


Wednesday, October 8, 2014

Return to the blogosphere

Recently one of my friends, Lauren, told me I should start blogging again. Hmm, good idea I thought... But what about was my next question. I asked my friends. I asked my husband. I asked my dog. Guess who's suggestions were the most helpful. My dog's! Just kidding, while she is my faithful companion, so's not so good with words. I got lots of different suggestions that all added up to: everything! Cooking, Smashbooking, Sewing, Quilting, Photography, TV shows I like, book reviews, EEEERRRRYTHING!
So here I am, offering eeerrrrything.
My biggest doubts always revolve around who on earth would be interested in what I have to say. Then one of my friends said: who cares? Just write it like it's a diary without an audience. So, jep, that's happening!


Much has changed in my life. Or perhaps it's more that much hasn't happened. I've decided that getting rejected from grad school may just have been a blessing in disguise. Not having to go through multiple additional years of school, not having another set of extensive debts, and not having to put my life on hold for so much longer. I've decided to stay with my company and work towards advancement within the company. We shall see! As of now I'm hoping my schedule will settle and I can start getting a bit more routine in my life. If this day ever comes, I'm hoping to spend time on my hobbies. Therefore have fodder for blog posts.

Now my goal is to do something interesting every day. Whether it makes it on the blog or not is another question. Here comes my life as a wife, DSP, photography enthusiast, smashbooker, quilter, Netflix aficionado, and cook. Who knows what else could be added to the list of things I am/will be.